How to Register and Bind a US-Region Apple ID (Illustrated Guide)
If you want to download overseas apps, use US-region exclusive services, or experience features like ChatGPT Plus, registering a US-region Apple ID is a must! This tutorial will walk you through how to register and successfully bind a credit card (such as a WildCard card) step by step, with no need for a VPN throughout, and is suitable for absolute beginners.
# 1. Preparation Before Registering a US-Region Apple ID
Before you begin, make sure you have the following:
- A mainland China mobile number that can receive SMS
- A brand-new email that has never been registered with Apple ID (163 email or Gmail is recommended; avoid QQ email)
# Notes:
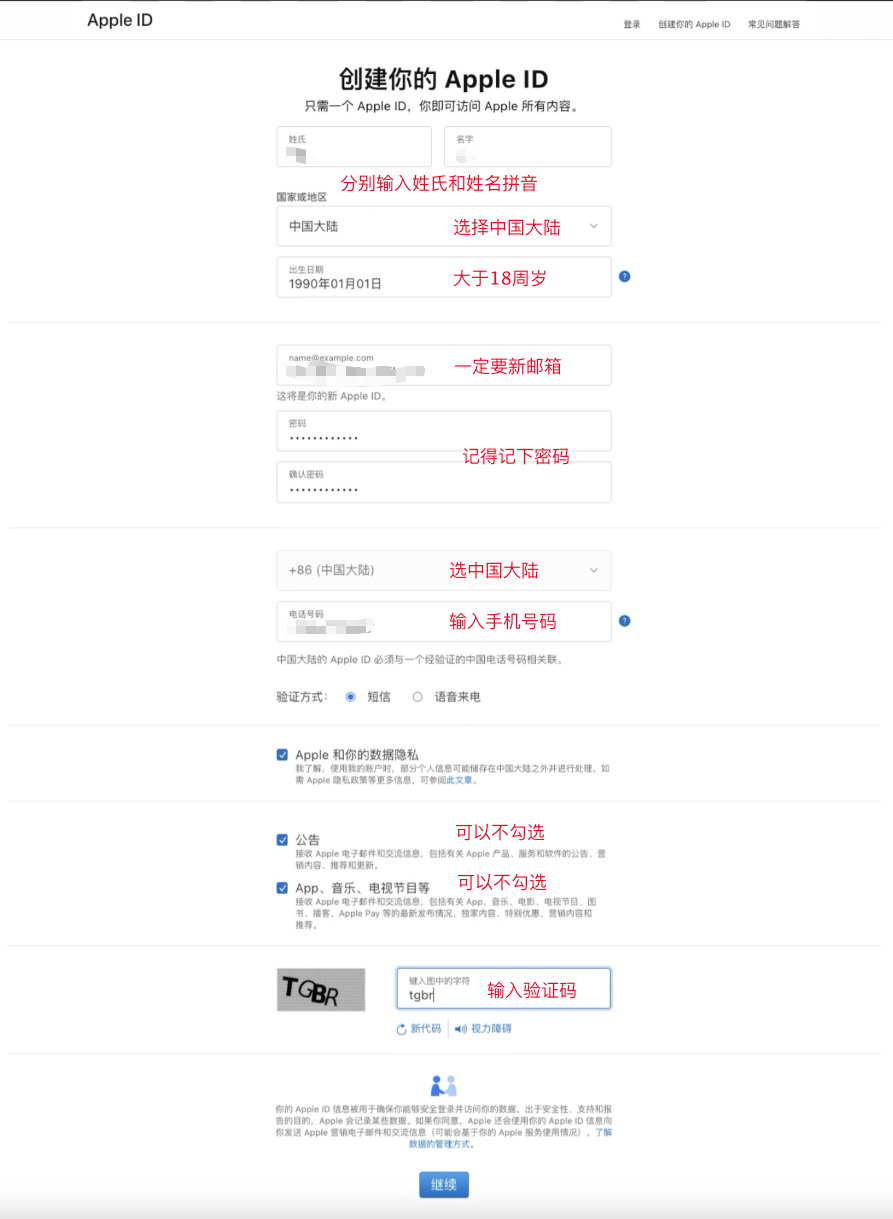
- Date of birth: Set it to over 18 years old, otherwise you may face age restrictions and be unable to download certain apps.
- Email: Be sure to use a brand-new email never registered with an Apple ID (163/Gmail is recommended).
- Password settings: Avoid using personal information (such as your name, birthday, or email) so you don't run into problems during later verification.
# 2. Registering a US-Region Apple ID: Detailed Steps
These steps can be completed on your phone or computer. It's recommended to open the official site in Safari.
# 2.1 Open the Apple ID registration page
Go to the Apple ID registration page: https://appleid.apple.com/account (opens new window), and fill in your name, date of birth, email, password, and other basic information.
# 2.2 Verify email and phone number
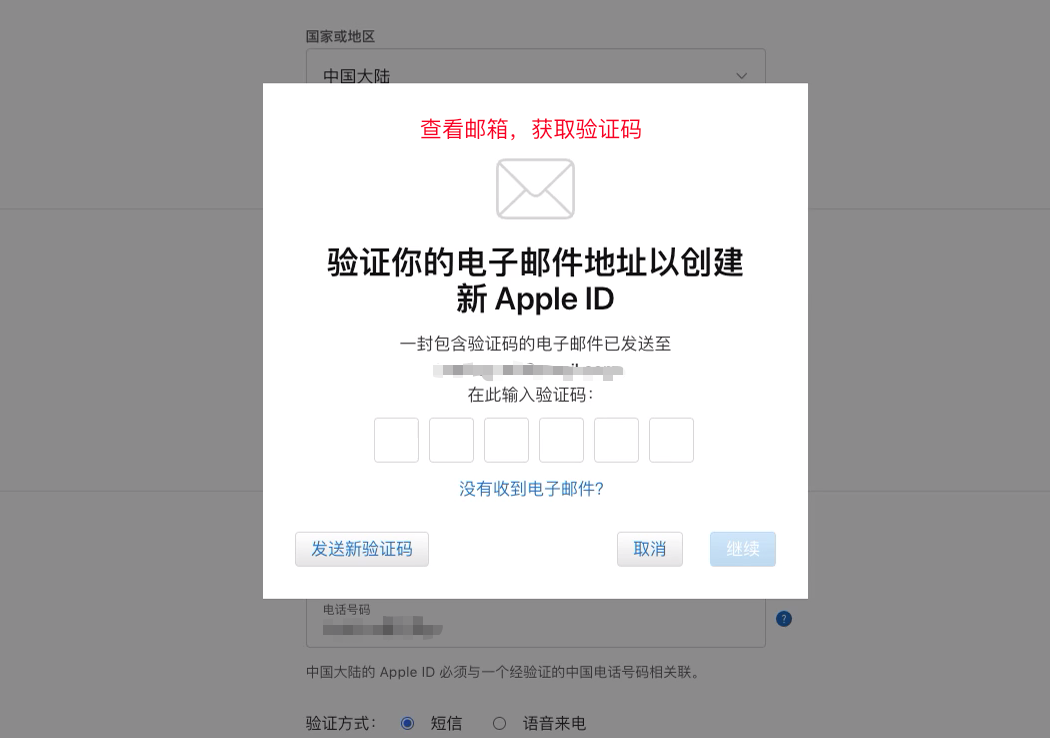
Apple will send a verification code to the email and phone number you entered. Enter the codes and click "Next" to continue.
# 2.3 Log in and modify your personal information
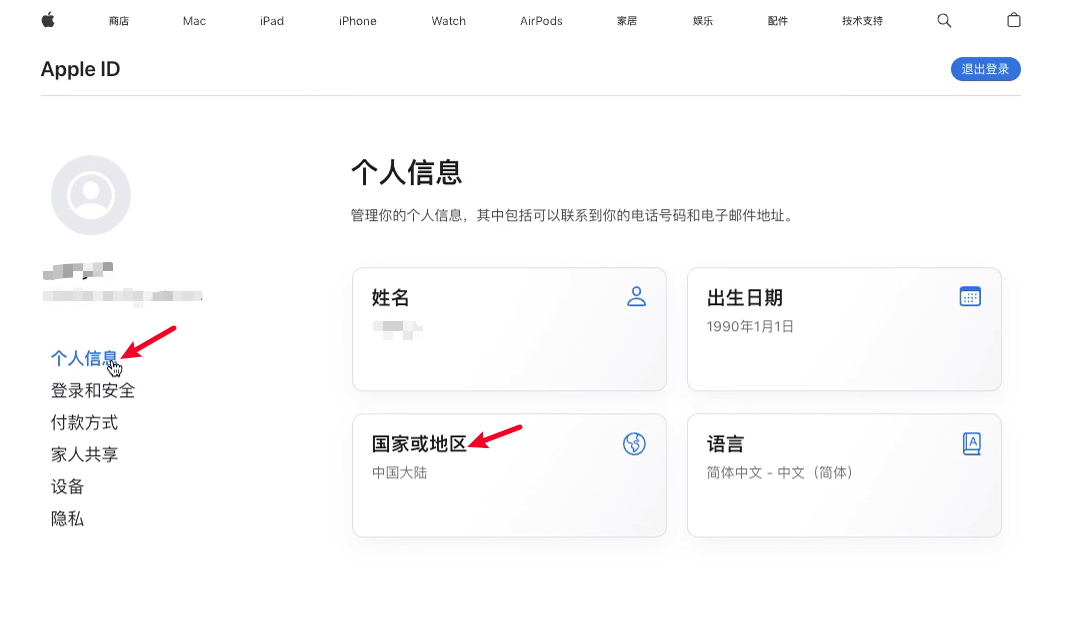
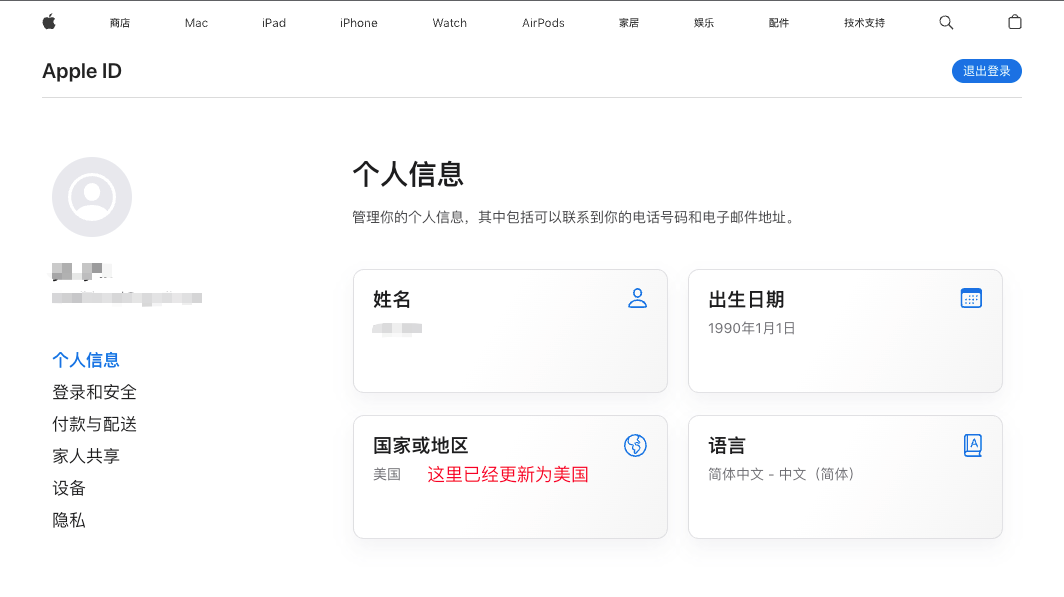
After registration, log in to the Apple ID home page with your email and password. Go to Personal Information > Country or Region, click in, and change it to United States.
# 2.4 Change country to the United States and add a credit card
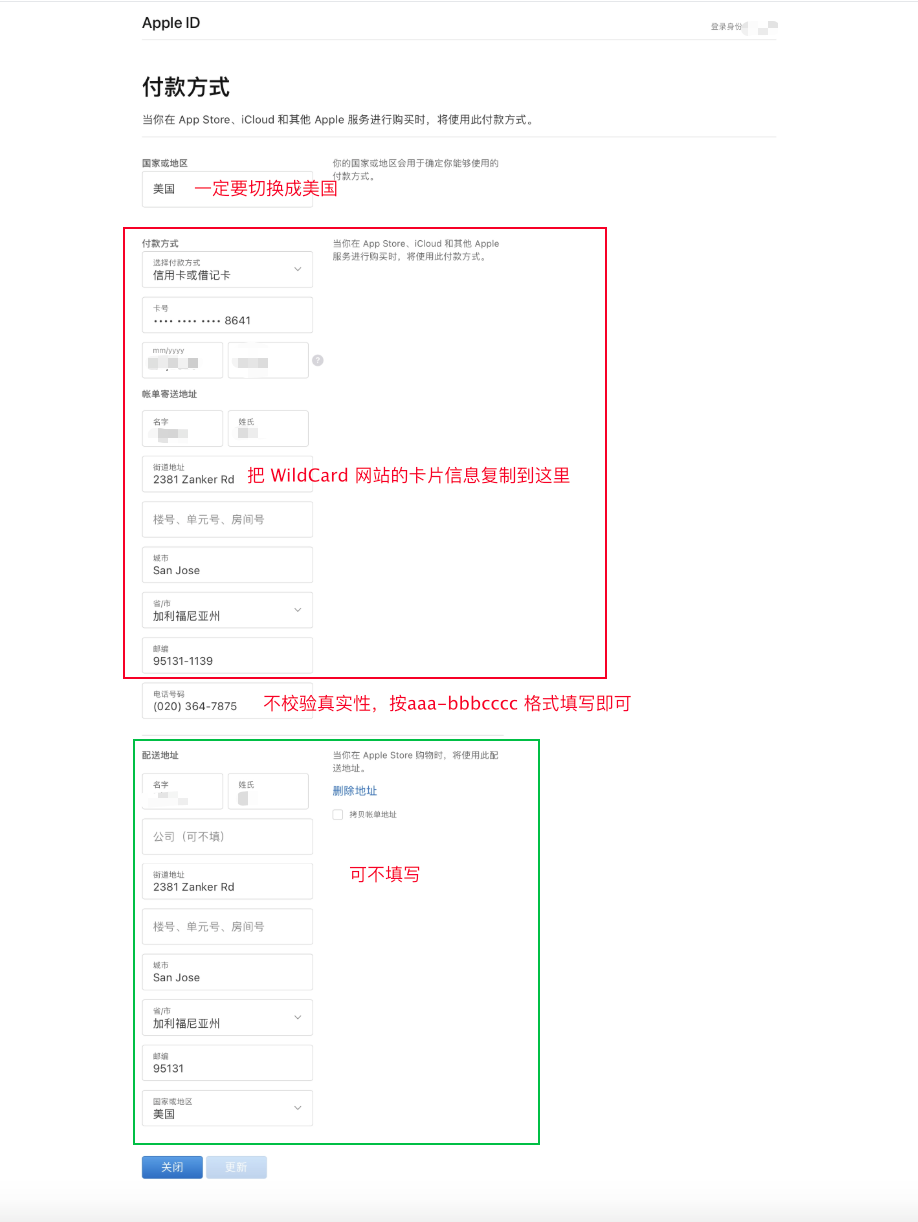
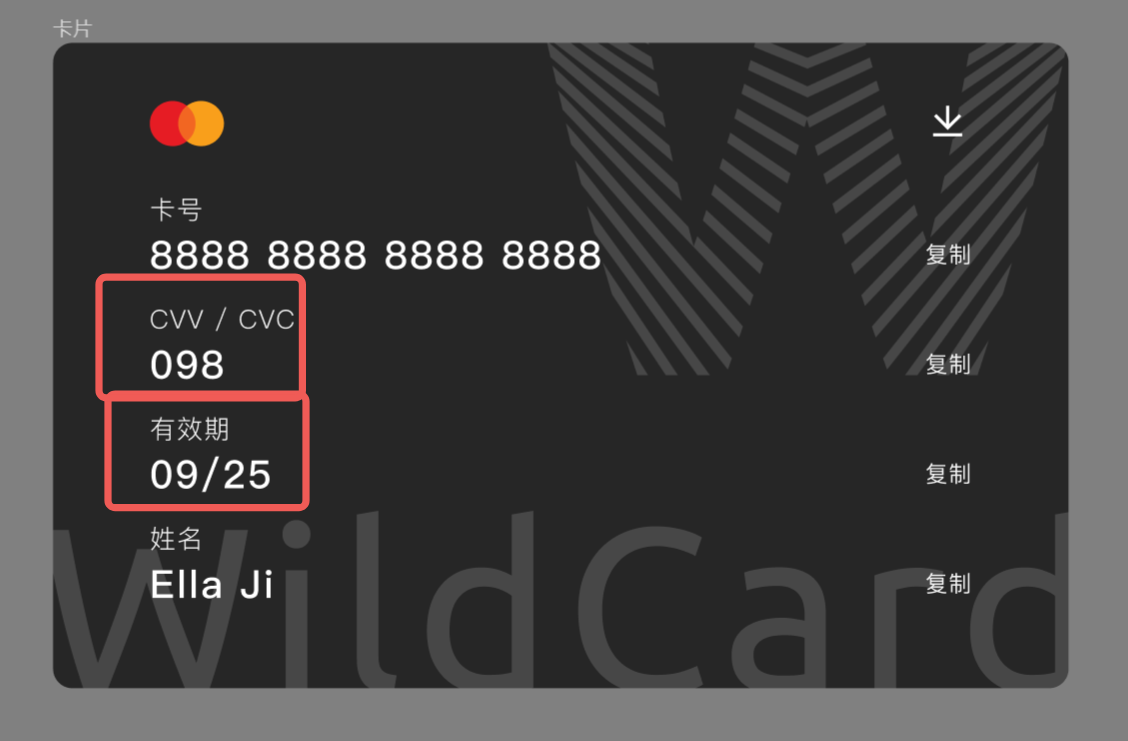
Bind your credit card by following the instructions below. On the payment information page, set the country or region to "United States" and enter your credit card information:
- Card number
- Expiration date
- CVV security code
- Billing address (fill in according to the billing address provided by the credit card)
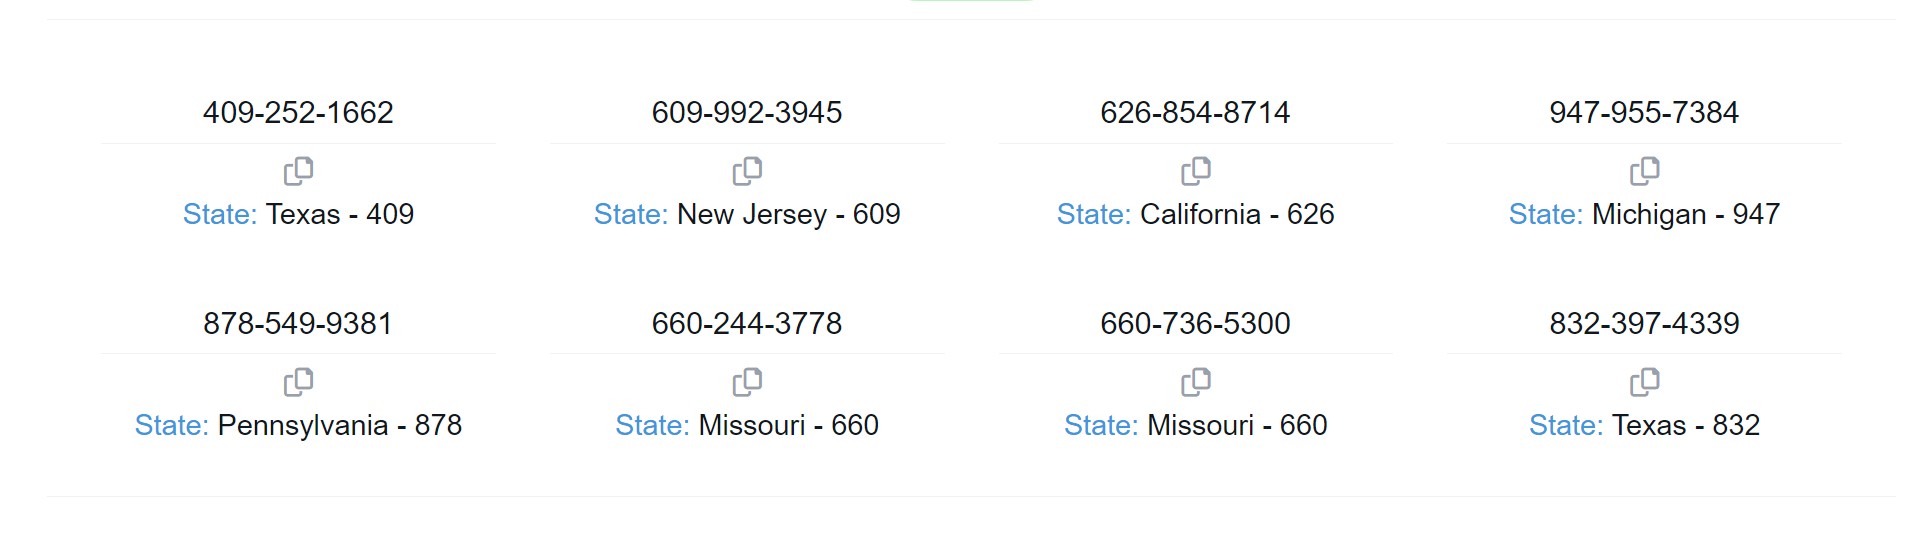
US phone number recommendations:
US phone numbers are 10 digits, with the first three being the area code, which must match the region of your billing address. Common US area codes include:
- Delaware: 302
- Montana: 406
- Oregon: 541
- New Hampshire: 603
You can use the following site to generate a random US phone number: https://www.generatormix.com/random-phone-numbers (opens new window)
# 2.5 Getting "Unable to verify payment information"? Here's the fix
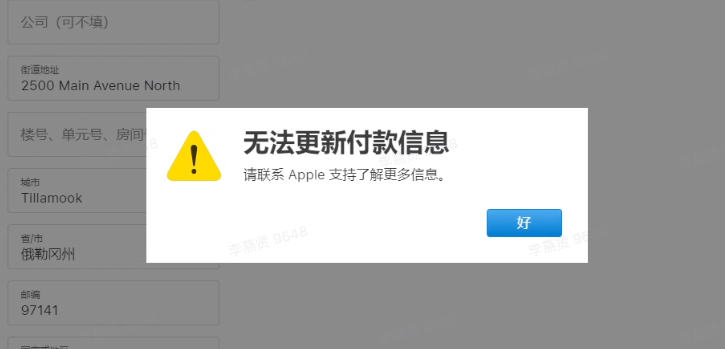
If you get an error that payment information cannot be verified when clicking "Update", Apple's account protection mechanism may have been triggered.
# Solutions:
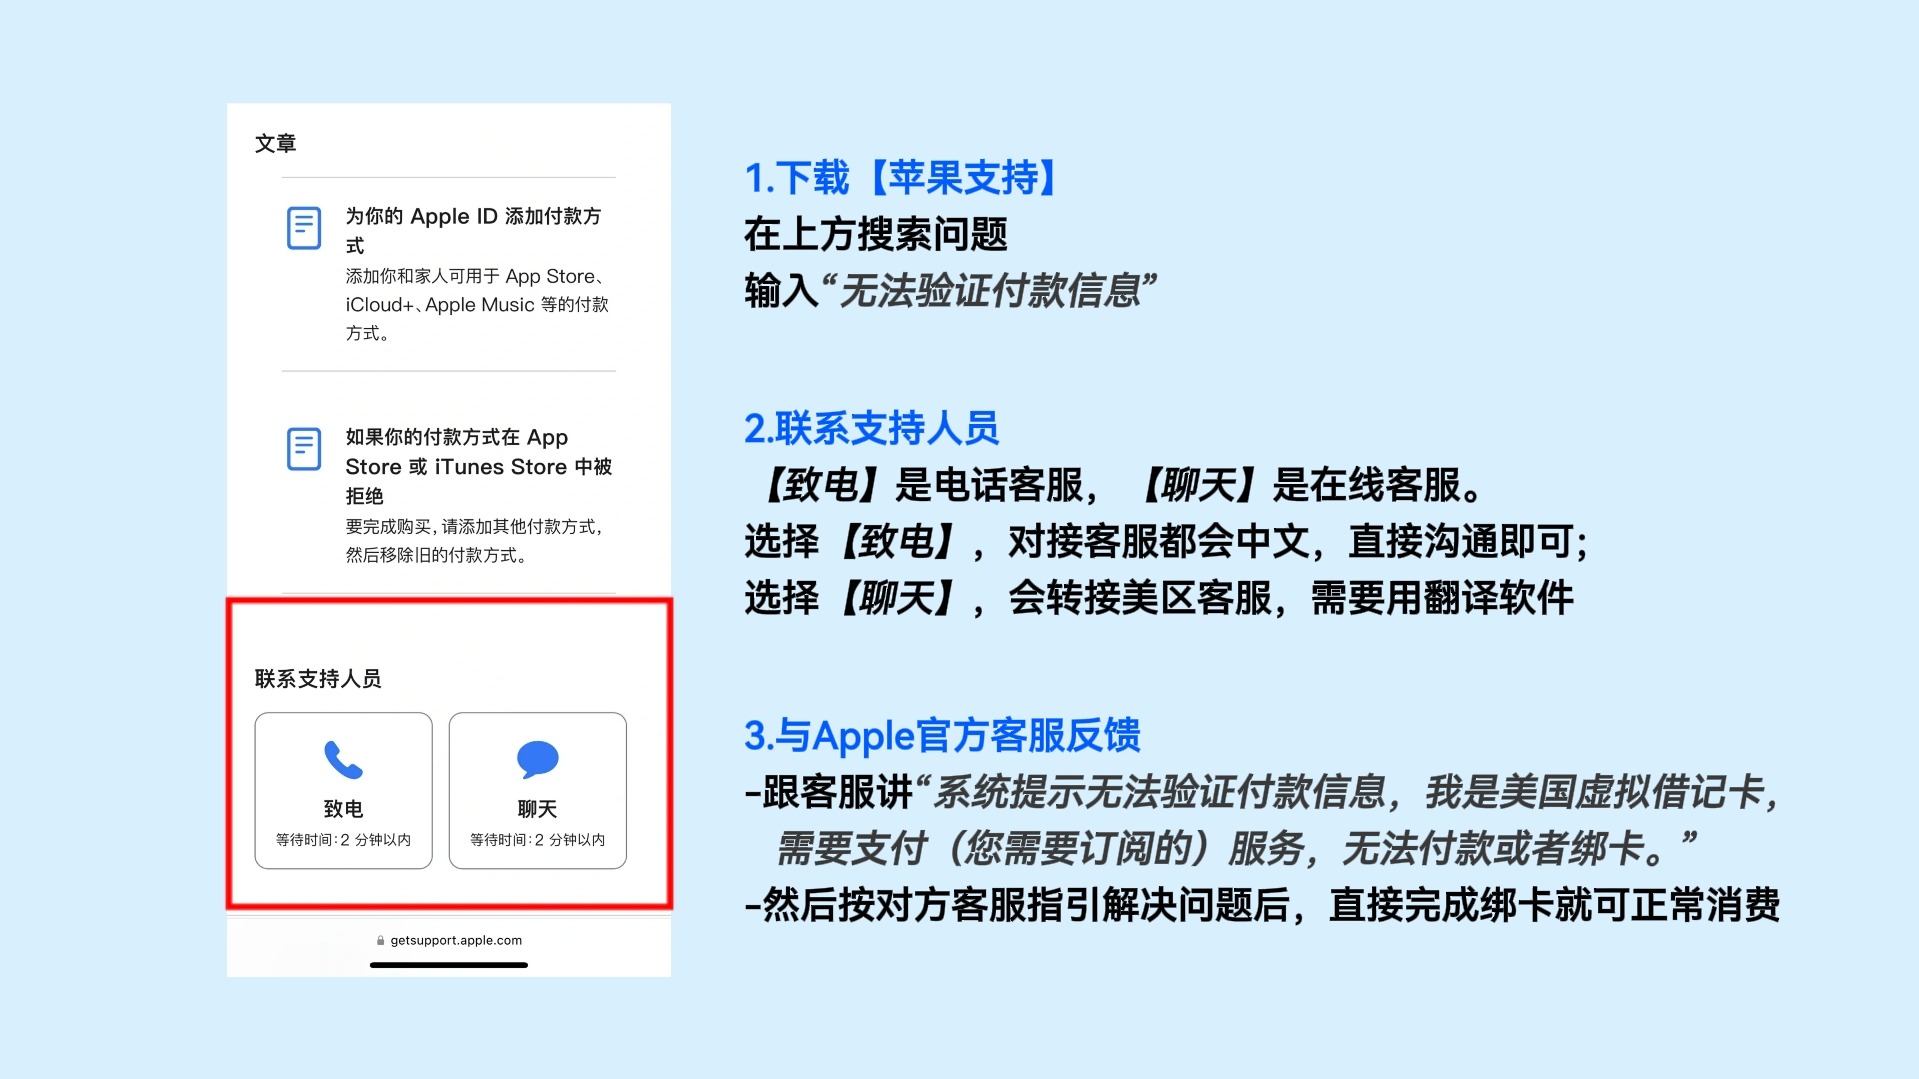
Download and open the Apple Support app
In the app, search for: "Unable to verify payment information"
Contact Apple support:
- Call support: Choose Chinese-language support to communicate.
- Chat support: If you need English support, get transferred to US-region English support, and consider using a translation tool.
Explain to support:
"The system says it can't verify my payment information. I'm using a US virtual debit card and want to subscribe to a service, but I can't finish binding the card."
Support will help you complete the subsequent verification process.
After finishing the setup, click "Save Changes" and you'll have successfully switched your Apple ID's country to the United States.
# 2.6 Confirm credit card binding status
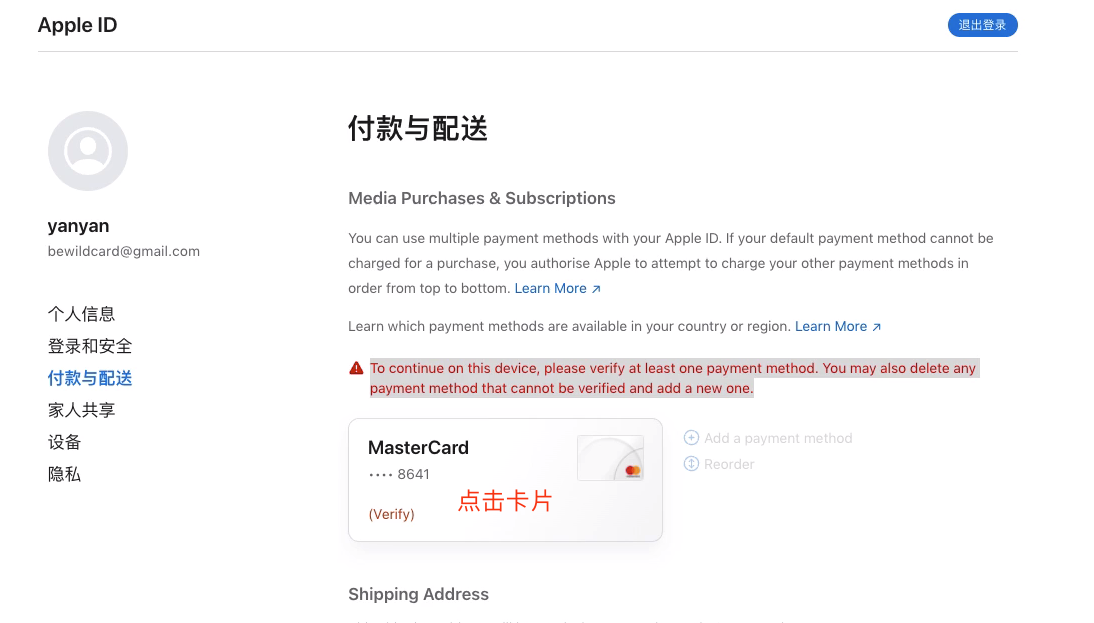
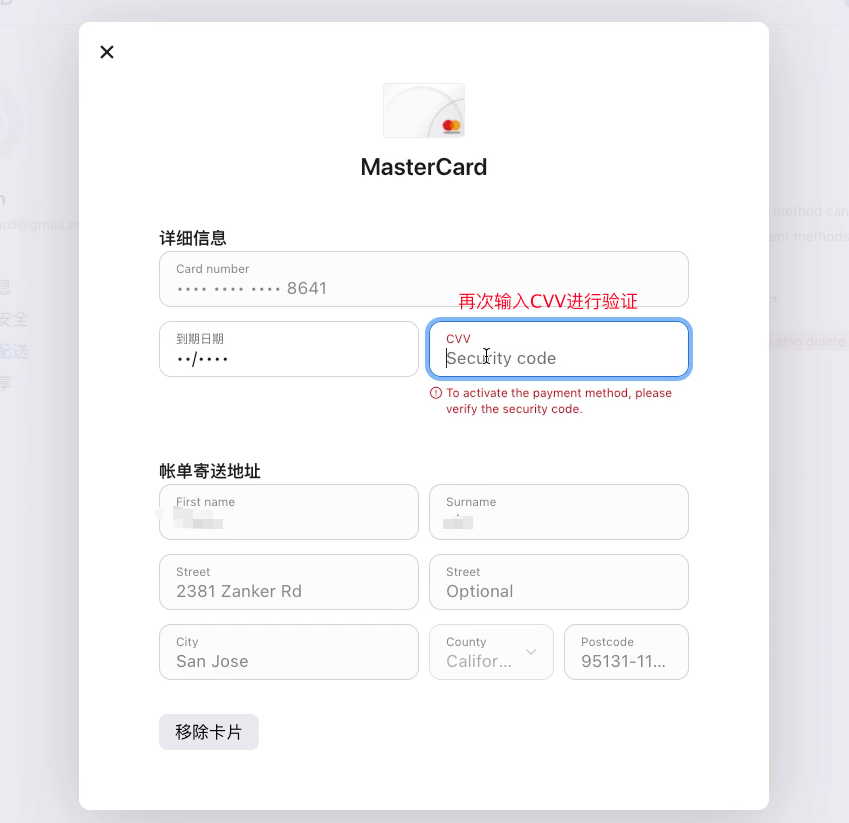
Go to the Payment & Shipping page and check whether the credit card was successfully bound. If the system prompts you to add information, re-enter the CVV and save.
# 3. Conclusion: Your US-Region Apple ID Is All Set
Congratulations! You've successfully registered and bound a US-region Apple ID. Now you can:
- Download US-region-only apps (such as TestFlight, ChatGPT Plus, etc.)
- Use US-region services (such as Apple Music, Apple TV+, etc.)
- Use a credit card to spend freely, with no physical card or US address required
If you have any questions, feel free to share and discuss in the comments!